The volume of the recorded voice is too low! ~ A trick to adjust the volume appropriately with "Audacity"
- 1211
- 98
The volume of the recorded voice is too low! ~ A trick to adjust the volume appropriately with "Audacity"
- By huaweicomputers
- 15/11/2022
If your digitized sound source is too low, basically it's because the recording level was set too low when you recorded it. In other words, the higher the recording level, the louder the resulting sound source.
If you write it like this, the solution is very easy to read, but if you raise the recording level setting and the input audio signal exceeds 0 dB, clipping will occur at that point and the sound will Distort. It's clearly a failure because the source record or cassette tape track is not distorted.
If the audio signal exceeds 0 dB during recording, clipping will occur.While you can use waveform editing software such as Audacity to perform various editing tasks, clipping that has occurred cannot be corrected. There is no choice but to re-record the sound source. You want to set the recording level as high as possible, but if even one part of the sound source that has been digitized over a long period of time exceeds 0 dB, you will have to start over and make a mistake. higher.

To prevent this failure, use the sound source file that has been digitized as a base and adjust the volume using the editing function of the waveform editing software. You can manually adjust the volume in Audacity, but that's cumbersome and runs the risk of clipping if it fails. By performing an editing process commonly called normalization, you can automatically analyze the contents of the sound source file and raise the volume to the optimum level.
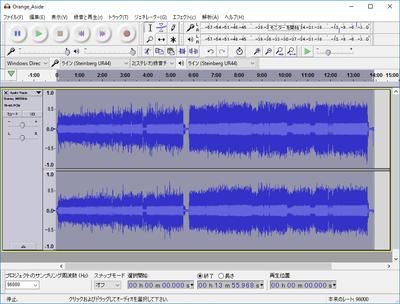
First, load the recorded sound source file into "Audacity". Then select Normalize from the Effect menu. As you can see from the fact that "Normalize" is displayed in the opened dialog, normalization is expressed as normalization in the Japanese display of "Audacity".
Select [Normalize] from the [Effect] menu. The Japanese display of "Audacity" expresses normalization as normalization Screen during volume normalizationBasically, you do not need to change the settings manually Click [OK] to automatically analyze the sound source loaded as a track and increase the volume within the range where clipping does not occur (= the setting value of [Normalize maximum amplitude]). If you compare the track with the track before normalization, you will notice that the vertical width of the waveform has increased. Of course, even if you play it, you should be able to realize that the volume is getting louder.
After normalization, you can see that the vertical width of the waveform has increased, and the volume has increased. If you load them, select them all with the [Ctrl] + [A] keys on the keyboard and execute [Normalize] from the [Effect] menu to analyze and normalize all tracks. If you want to match the maximum volume of each sound source file, you can easily do it with this. Finally, if you execute [Export multiple files], you can save each track as an independent WAV file.It is also possible to analyze and normalize multiple tracks.If you execute [Export multiple files], you can save each track as an independent WAV file. Established design. Since his time at Recruit, he has written mainly articles related to MIDI, audio, and recording. Having previously worked on the development of sequence software, MIDI interfaces, and computer sound sources, he still has a deep knowledge of systems. His publications include "Complete DTM Guidebook" (Ritto Music), "Dekiru Hatsune Miku & Kagamine Rin/Len" (Impress Japan), and "MASTER OF SONAR" (BNN Shinsha). In addition to running the blog-type news site DTM Station, he also serves as a guide in charge of DTM and digital recording at All About. Follow @kenfujimoto on Twitter.[Read this author's article]


